Setting up bliss authentication with a reverse proxy
March 07, 2017 in bliss by Dan Gravell
bliss runs as a daemon style process, and its Web-based UI is accessible on both your own machine and also, potentially, others on your network. This is useful, because it means you can use bliss to edit metadata from, say, your tablet, if you are sitting on your sofa and notice a metadata problem.
If you set it up correctly, you can actually access your bliss installation from anywhere in the world. But as we open up more possibilities, we're also opening the potential for abuse. You don't want anyone to access and make changes to your music library. What you need is a way of people proving who they are; authentication.
There's nothing baked-in to bliss to perform authentication, although it's a much requested feature. But there's a way to provide authentication, and that's by configuring a proxy, basically a secondary Web server that accepts requests from a browser, authenticates them, and passes them to bliss when authenticated.
Windows
bliss user Jason Schafer has written up instructions for using NGINX as a proxy for bliss, on Windows.
Inspired by this, and shamelessly plagiarising Jason's work, I applied this to Linux and OS X:
Linux and OS X
Start by installing NGINX. This is the bit that depends on your distro, but normally it will be something like:
sudo apt-get install nginx
... on Debian based distros (e.g. Ubuntu). Red Hat users can use yum/dnf, and OS X users often use HomeBrew.
Once NGINX is installed we can edit its configuration. Edit the /etc/nginx/nginx.conf file and change the configuration to this:
user www-data;
worker_processes auto;
pid /run/nginx.pid;

events {
        worker_connections 768;
        # multi_accept on;
}

http {
        server {
                listen 8081;
                server_name localhost;
                auth_basic "Please Type User/Pass";
                auth_basic_user_file passwords;

                location / {
                        proxy_pass http://localhost:3220;
                        proxy_redirect off;
                }
        }
}
This creates a proxy on port 8081 which will authenticate, and then pass you to bliss if you pass authentication.
Now it's time to create your user names and password. We do this by adding lines to the /etc/nginx/passwords file. You can encrypt the password as so:
$ sudo su
# printf "bliss-user:$(openssl passwd -apr1)" > /etc/nginx/passwords
Substitute bliss-user for the desired username. This will ask you for the password. Once you type one and press Enter the line will be added to the passwords file, and you can test the authentication!
Simply navigate to the port you configured earlier... let's say you're doing this on your local machine, that would be: http://localhost:8081 . Here's what you get:
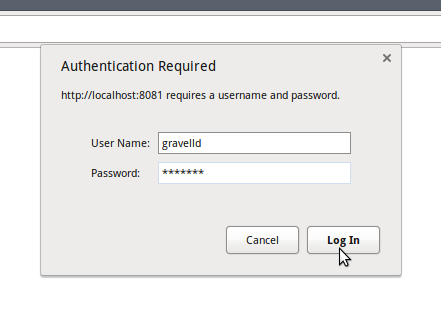
Enter the user name and password you just configured, and bam!:
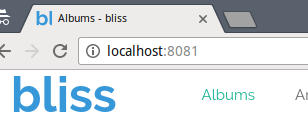
Note the port is different to the normal 3220.
I hope that helps you set up authentication for bliss!
Thanks to dvanzuijlekom for the image above.


