Installing bliss on an ASUSTOR NAS with Docker and Portainer
October 12, 2026 in bliss by Dan Gravell
 ASUSTOR NAS devices make great homes for a music library, and if you have an ASUSTOR that supports Docker you can run bliss on it alongside your other apps. There isn’t an App Central package for bliss yet, but the official bliss Docker image works within the ASUSTOR Docker integration. This walkthrough covers an ASUSTOR running ADM 5, using the Docker Engine and Portainer CE apps published by ASUSTOR.
ASUSTOR’s ADM operating system includes Docker support on many of its models, and App Central makes it easy to add a container manager. We’ll use Portainer CE, the graphical front-end that ASUSTOR publishes, to deploy bliss as a Docker stack. If you’re comfortable with the command line you can do the same thing with docker over SSH, but Portainer keeps everything in the web UI.
This guide was put together with help from a bliss user who got bliss running on their own ASUSTOR. If you run into something ASUSTOR-specific that isn’t covered here, get in touch.
Pre-requisites
Before you start, make sure you have:
- An ASUSTOR NAS running ADM 5 (or another ADM version with Docker support).
- Somewhere to keep your music library, shared over your network, and ideally some spare RAM.
Docker Engine, available from App Central. This is what actually runs the containers.Portainer CE, available from App Central. This is the web UI you’ll use to deploy bliss. It’s published by ASUSTOR, and installing it will pull inDocker Engineas a dependency if it isn’t already installed.Docker Registry Pack, also available from App Central. This lets Docker download images from registries.
1. Install Docker Engine and Portainer CE
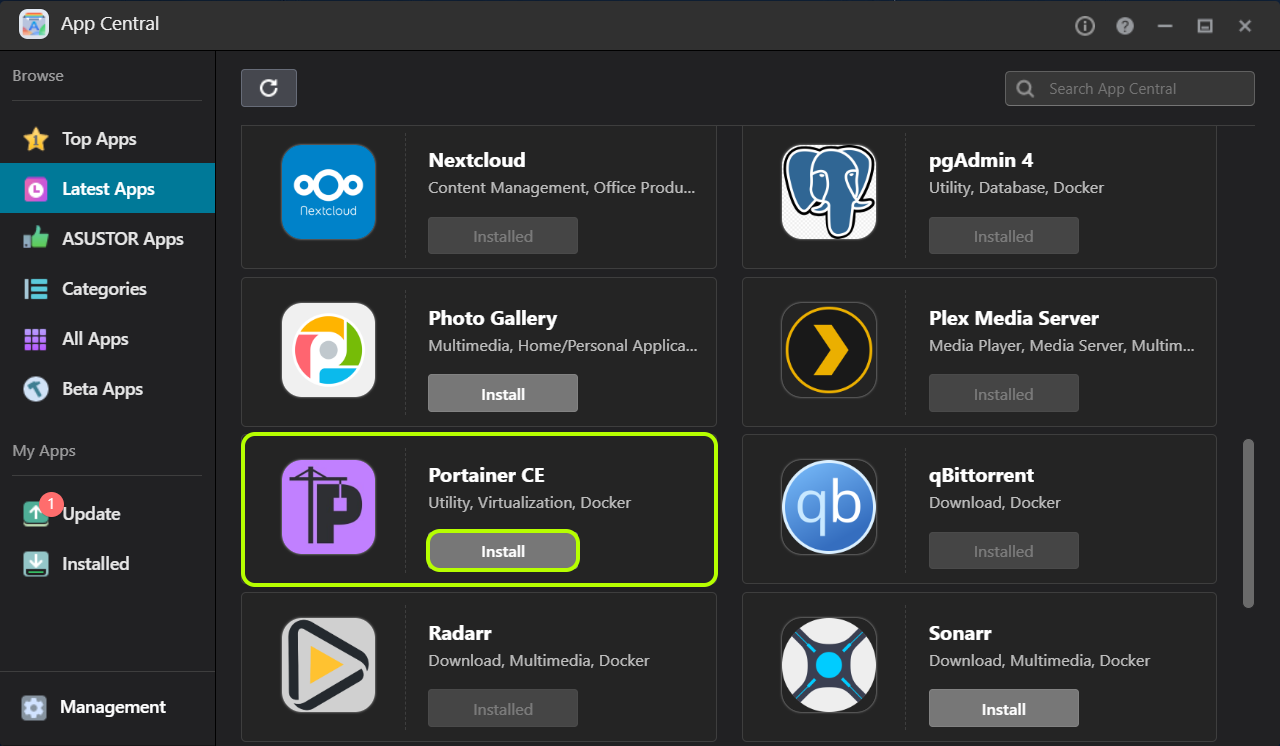
Sign in to ADM as an administrator and open App Central. Search for Portainer (or browse ASUSTOR Apps) and click Install on Portainer CE. ADM will install Docker Engine first if it’s missing, then Portainer CE.
2. Create the Portainer administrator user
Portainer runs its own web interface on a different port from ADM. On ASUSTOR the URL is:
https://<NAS IP>:19943
Open that address from a computer on your local network.
The first time you open Portainer it asks you to create an administrator user. Fill in a username and a password of at least twelve characters and click Create user.
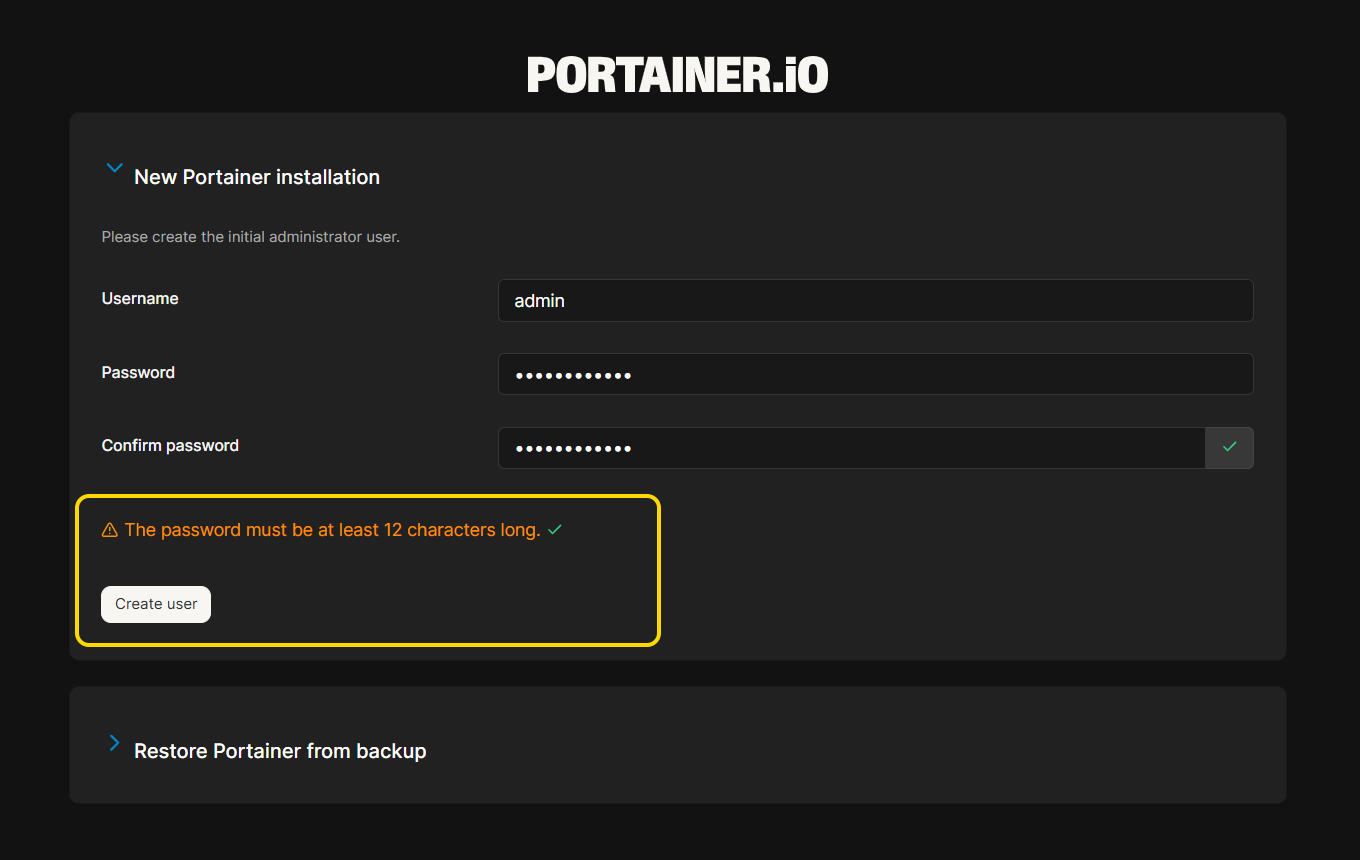
Create this user straight away. Portainer times out the first-run setup after a few minutes; if that happens, use App Central to switch Portainer CE off and on again, then reopen it.
3. Create a folder for bliss’s configuration
bliss needs a folder to store its database, settings and licence - somewhere outside the container, so that it survives updates. On an ASUSTOR this is best placed in the Docker shared folder.
Open Access Control in ADM and select Shared Folders. You should see the standard Docker share - the folder ASUSTOR provides for Docker apps’ data.
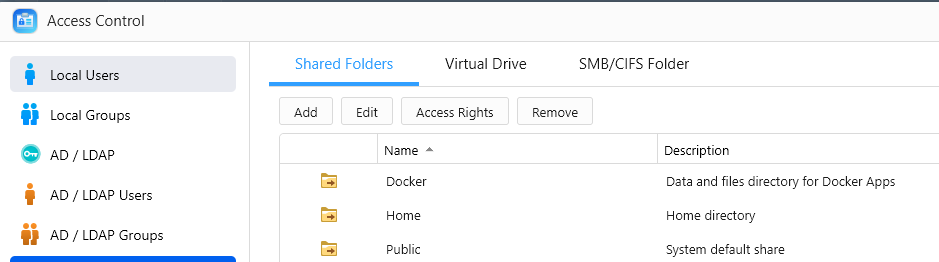
Open File Explorer and, inside the Docker share, create a new folder called bliss. Its full path will be:
/volume1/Docker/bliss
We’ll map that path into the container in the next step.
4. Deploy bliss as a stack
In Portainer, select your local environment and choose Stacks from the left-hand menu, then click Add stack.
Give the stack the name bliss, make sure Web editor is selected, and paste the following Compose file:
services:
  bliss:
    image: elstensoftware/bliss:latest
    container_name: bliss
    user: "1000:100"
    restart: unless-stopped
    ports:
      - "3220:3220"
      - "3221:3221"
    volumes:
      - /volume1/Docker/bliss:/config
      - /volume1/home/<username>/Music:/music
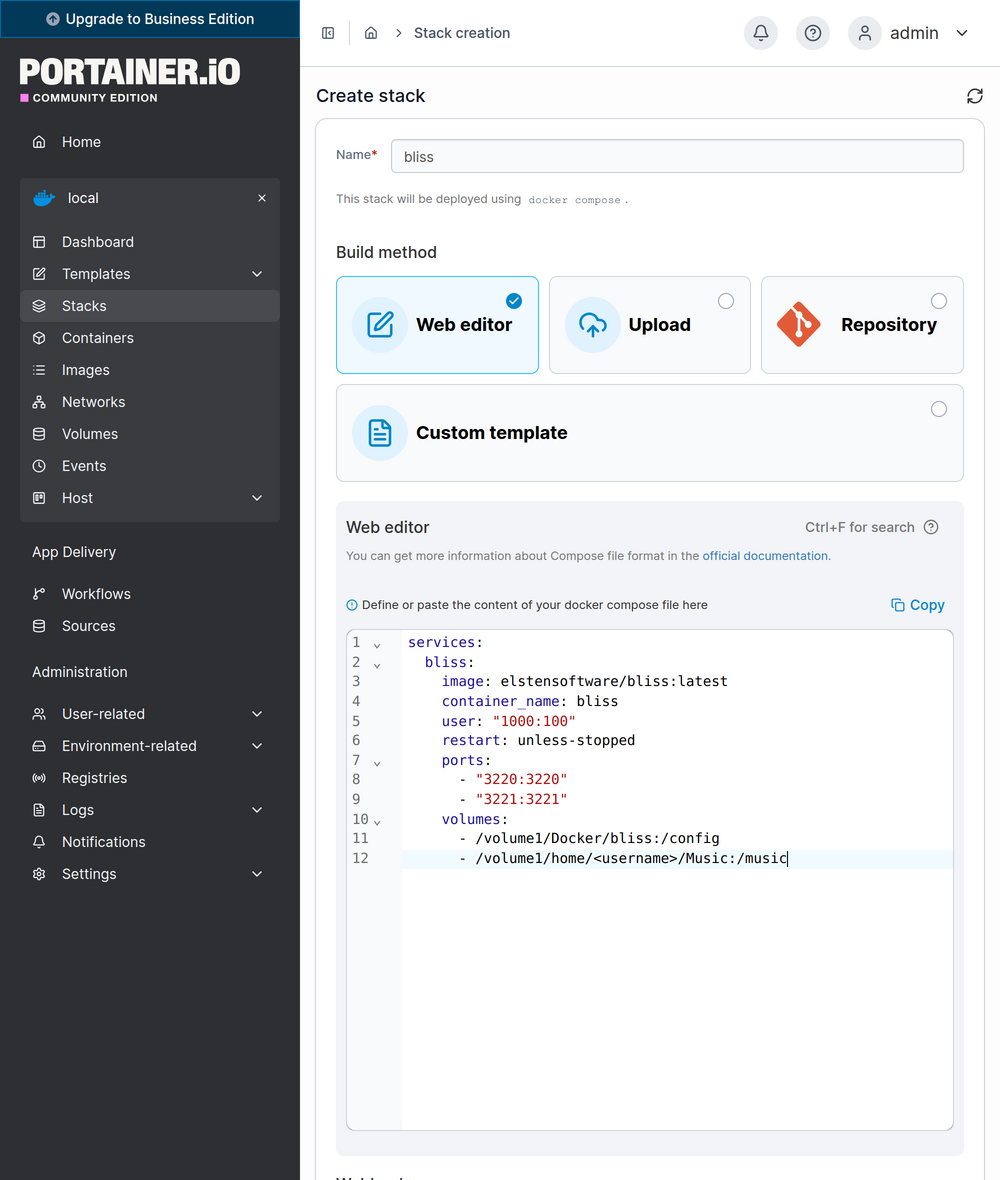
A couple of things to check before you deploy:
- The music path. Replace
/volume1/home/<username>/Musicwith the real path to your music library. TheHomefolder for an ADM user lives at/volume1/home/<username>, which isn’t obvious from File Explorer. If your music is in a shared folder instead (for example/volume1/Music), use that path. - The
user:line. This tells Docker which user and group to run the container as. We’ll come back to why it matters below.
Click Deploy the stack. Portainer will download the elstensoftware/bliss image and start the container.
5. Open bliss
Once the container is running, open:
http://<NAS IP>:3220
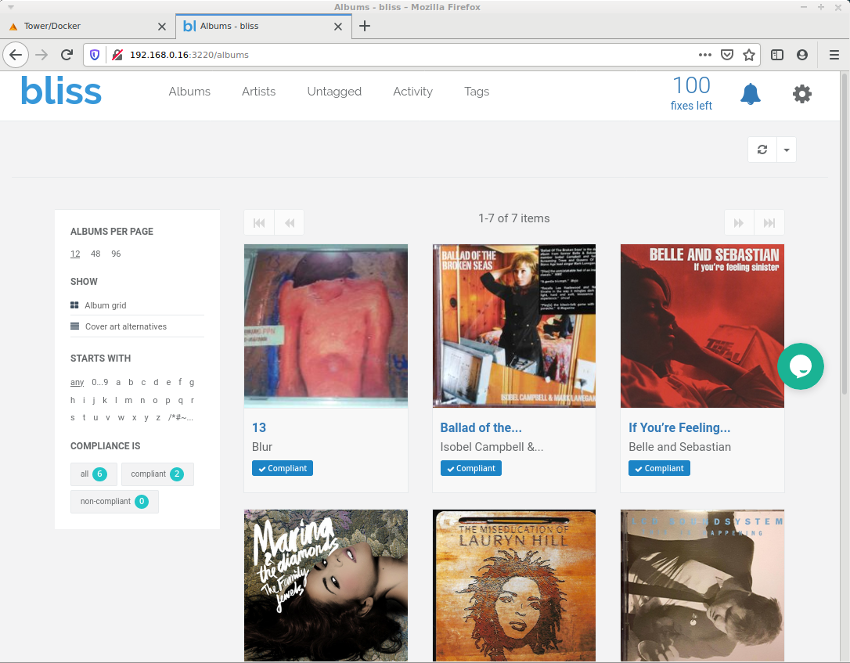
You should see the bliss setup page. Point the Music location at /music - that’s the folder we mapped into the container in the Compose file - and bliss will start scanning your library.
Why the user: line matters
This is the one ASUSTOR-specific gotcha. Without the user: line, the container restart-loops with errors like:
java.nio.file.AccessDeniedException: /config/.bliss
mkdir: cannot create directory '/config/.bliss/': Permission denied
That’s because, by default, the container runs as a user that can’t write into the bliss folder you created. On ASUSTOR, 1000 is normally the ID of the first user account created, and 100 is the users group, so user: "1000:100" usually matches the folder’s owner. If your account has a different ID, or the folder is owned by someone else, set the line to the appropriate user and group. As a fallback, user: "0:0" runs the container as root, which will always be able to write to the folder. But cool admins don’t run as root.
Updating bliss
To update, stop and re-create the stack in Portainer (Stacks > bliss, then Editor or Update the stack), making sure Re-pull image is selected. Portainer will fetch the latest elstensoftware/bliss image and start a fresh container, keeping your existing configuration and music.
Thanks
Thanks to Dave, who worked this out and shared their notes. Hopefully it saves other ASUSTOR owners a bit of head-scratching! If you’re running bliss on an ASUSTOR model that isn’t mentioned here, or you found a different way to do it, let us know in the comments below.


