Music syncing with Nextcloud
April 02, 2020 in digital music by Dan Gravell
![]() What’s difficult doesn’t get done. I’m often reminded of that when I realise I forgot to sync my phone with my latest music. Such is the plight of the self hoster.
What’s difficult doesn’t get done. I’m often reminded of that when I realise I forgot to sync my phone with my latest music. Such is the plight of the self hoster.
So something I’ve been looking into recently is automated synchronisation of music libraries. Ideally I want a way that my phone, an SD card, and other locations get their data synchronised automatically. Here’s one way of doing this - using Nextcloud.
Nextcloud is self hosted server software that works a bit like Google Drive or Microsoft OneDrive. The big difference is that self hosted bit.
You can upload or create files on the service, and edit them with various web applications. You can store your documents, presentations, photos, videos and more. And, of course, you can store your music.
“Self hosted” means you own the infrastructure on which Nextcloud runs. That doesn’t just mean you have to install it on a server or computer in your house; you could equally use a rented server in something like Amazon EC2. In addition, you can purchase devices with Nextcloud already installed so it’s plug-and-play, or you can rent Nextcloud ready-hosted by a provider.
Nextcloud is free to use (support costs though), so I decided to give Nextcloud a go - here’s my walkthrough of setting up music synchronisation.
Installation
Aiming to get an easy proof of concept up and running, I decided to use the Docker installation method. There are lots of other ways to install, though.
Docker is easy and convenient because it is a pre-packaged virtual machine image which you can just run and everything is already setup in terms of software installation; all you have to do is configure it.
$ sudo apt install docker.io
$ usermod -a -G docker [your username]
Then restart the bash session - I just opened a new Terminal tab.
We’re now able to install Nextcloud. I issued a docker pull command, which downloads the Docker image from Docker Hub (an online repository of Docker images - and yeah, there are Docker images for bliss too)
$ docker pull nextcloud
Using default tag: latest
latest: Pulling from library/nextcloud
68ced04f60ab: Downloading  5.024MB/27.09MB
1d2a5d8fa585: Download complete
5d59ec4ae241: Downloading  7.515MB/76.65MB
d42331ef4d44: Download complete
408b7b7ee112: Downloading  3.677MB/18.68MB
570cd47896d5: Waiting
2419413b2a16: Waiting
...
So that’s the image downloaded, and ready to run.
When Nextcloud runs it has a Web interface, like bliss. We need a port on which the Web interface can run.
$ sudo lsof -i -P -n | grep LISTEN
rpcbind    1103                root    8u  IPv4  19126      0t0  TCP *:111 (LISTEN)
rpcbind    1103                root   11u  IPv6  19129      0t0  TCP *:111 (LISTEN)
rsync      1120                root    4u  IPv4  26710      0t0  TCP *:873 (LISTEN)
rsync      1120                root    5u  IPv6  26711      0t0  TCP *:873 (LISTEN)
...
...
java       1499               music    4u  IPv4  33856      0t0  TCP 192.168.0.3:8000 (LISTEN)
java       1499               music   10u  IPv6  32067      0t0  TCP 127.0.1.1:3222 (LISTEN)
java       1499               music  120u  IPv6  32445      0t0  TCP *:3220 (LISTEN) **<-- bliss!**
...
java       1764             tomcat8   41u  IPv6  33941      0t0  TCP *:8080 (LISTEN)
...
In my case the default port 8080 was already taken, so I’ll arbitrarily choose 8081.
The next thing to do is make our music accessible to Nextcloud. The easiest way to do this is map existing storage on the host computer to the Nextcloud container.
I create a folder which we’ll be able to use for Nextcloud data:
sudo mkdir /mnt/vm/docker/nextcloud.data
(There’s nothing special about /mnt/vm/docker, it’s just where I store Docker related files on this host).
I copy music files into a well-known location inside nextcloud.data:
$ sudo -u www-data cp -r /mnt/media/music.nextcloud nextcloud.data/admin/files
Copying to admin/files means the files are stored for the admin user.
Finally we need to setup permissions otherwise we will get an error:
Can’t create or write into the data directory /var/www/html/data
That’s because our new data folder doesn’t have the correct permissions. The source directory /mnt/vm/docker/nextcloud.data must be readable and writeable by the www-data user in the Nextcloud container. The easiest way to do this is to find out the user and group ID, then chown the source directory.
This means we need to start the Docker container, just to retrieve the user ID:
$ docker run -d nextcloud
f366db973377237b6190c0ae3cc3984bfc34ceac28bfffed89fccaacb67f6b6e
The long string returned from the command is the container ID. It can be used to stop, restart and run commands in the container. So I can find out the ID of the www-data user by doing:
$ docker exec -u www-data f366db973377237b6190c0ae3cc3984bfc34ceac28bfffed89fccaacb67f6b6e id
uid=33(www-data) gid=33(www-data) groups=33(www-data)
(i.e. this simply runs id on the Docker container, as the www-data user)
Now I can set ownership of the music files:
$ sudo chown -R 33:33 /mnt/vm/docker/nextcloud.data
And stop the temporarily started container:
$ docker stop f366db973377237b6190c0ae3cc3984bfc34ceac28bfffed89fccaacb67f6b6e
Finally we can try re-starting Nextcloud with:
- The “mapping” of the port from port 8081 on the host computer to port 80 on the Docker container.
- The volume mapping from our music to Nextcloud’s data directory.
$ docker run -d -p 8081:80 -v /mnt/vm/docker/nextcloud.data:/var/www/html/data nextcloud
a51ca66f06c0eddcade46f71d99e363b66df1dd2de1e93903731b1e0b1f121c2
(Note the container ID has changed).
Nextcloud should now be running with its web pages served from port 8081. My home server’s name is bordeaux, so I browse to http://bordeaux:8080:
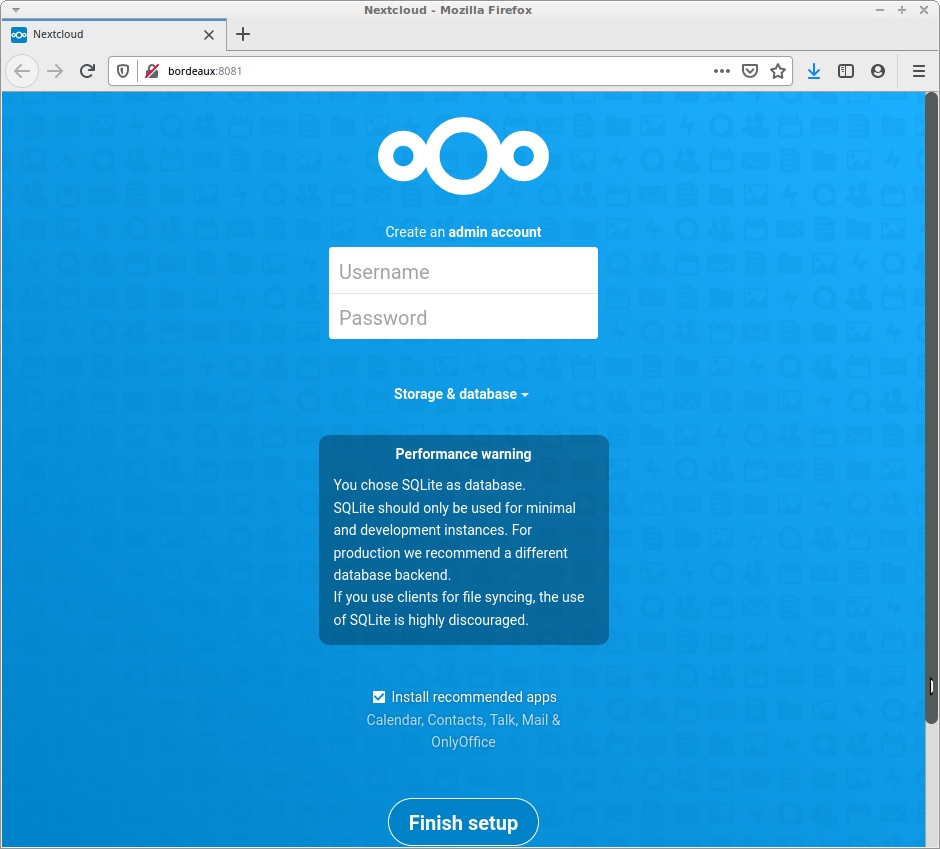
Thus begins the Installation Wizard. The first step is to create an administrator username/password. I enter my choices and accept the default Data folder and Configure the database options under Storage & Database.
There is a strong warning to not use the default SQLite database for file syncing. However, for this proof of concept I’ll just go with SQLite with the intention to replace it with Postgresql if it all works out (using Docker it is, after all, pretty easy to start over and get running quickly).
I’m only interested in file synchronisation so I deselect the option to Install recommended apps, but this is where you can install other cool stuff like photo sharing, document editing etc. Everything to create your own personal cloud!
Once I click Finish setup there’s a bit of a wait, and then the app begins to initialise.
Now for the music
Our music files, mapped previously, are now visible:
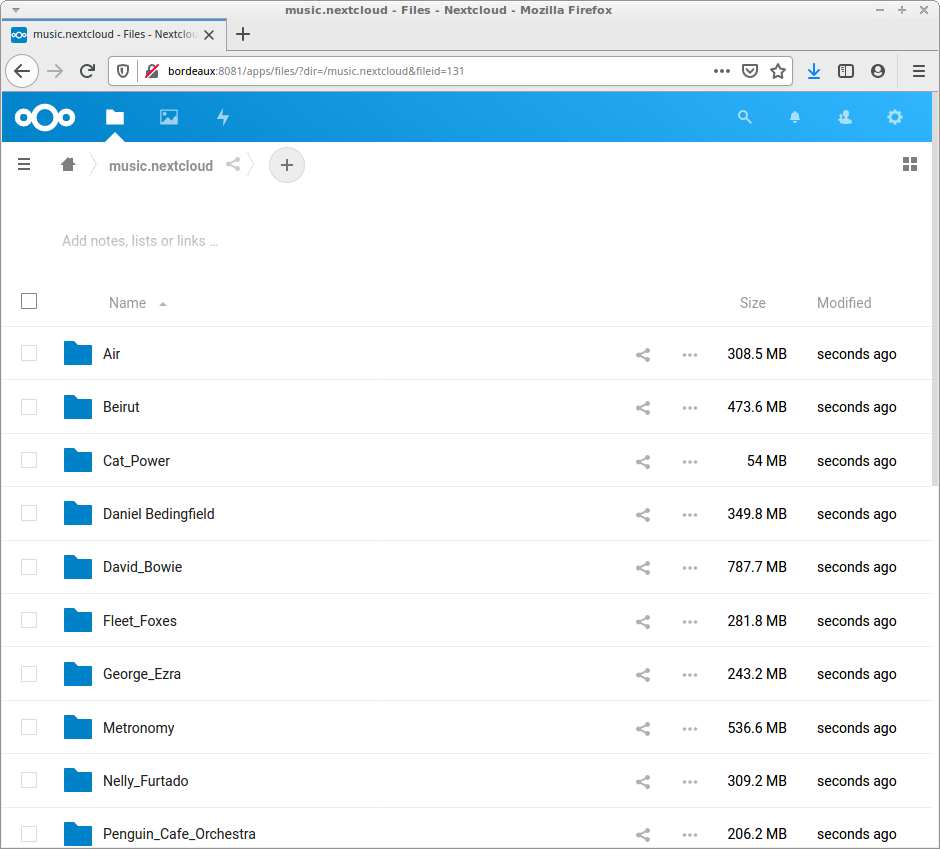
We can now do some cool stuff, like share links to the files, review version history of the files and more.
At this point I found the apps weren’t loading properly in Firefox. I found a bunch of Content-Security-Policy (CSP) issues and I switched to Chrome, which worked better.
$ docker exec -u www-data a51ca66f06c0eddcade46f71d99e363b66df1dd2de1e93903731b1e0b1f121c2 php occ files:scan --all
Starting scan for user 1 out of 1 (admin)
+---------+-------+--------------+
| Folders | Files | Elapsed time |
+---------+-------+--------------+
| 46      | 339   | 00:00:35     |
+---------+-------+--------------+
Hit play!
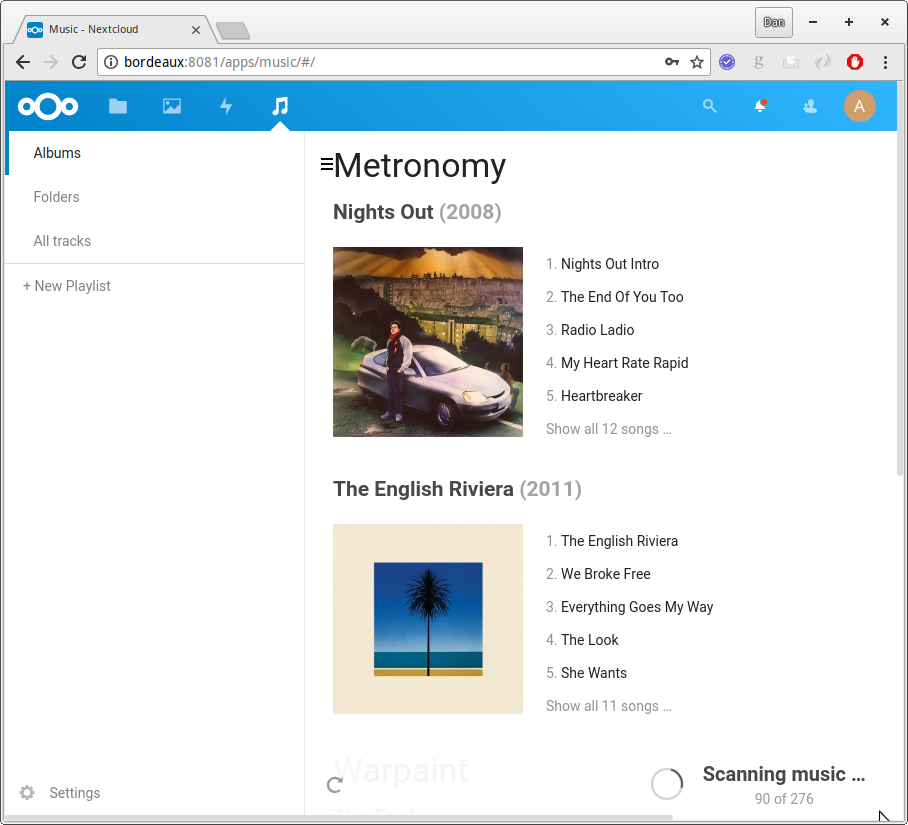
There are a couple of music playing apps for Nextcloud - Music and Audio player. The latter also has an ID3 editor (aside: that gives me an idea…).
I tried Music, though, because it has slightly better reviews. It scanned the music files and was able to play my files (once the scanning had completed).
But that’s an aside… what I was really interested in was file syncing.
File syncing
My original goal was to find a way of easily syncing (meaning: copying to local storage) music from the Nextcloud server to my ‘phone.
The primary way Nextcloud offers this is via the WebDAV protocol. There are official Nextcloud apps available for mobile but, being me, I decided I wanted a generic client. The fact that Nextcloud supports an open protocol like WebDAV makes that possible.
I found FolderSync did exactly what I wanted.
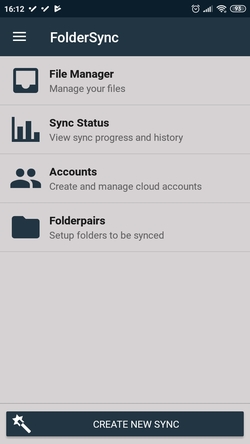
The home screen provides a menu into other parts of FolderSync - but initially you should click CREATE NEW SYNC
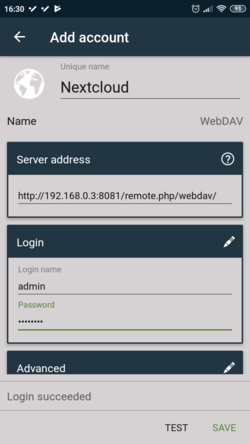
Choose a WebDAV account, then fill in the details to your Nextcloud server.
We point WebDAV to our Nextcloud server and to a well known location: /remote.php/webdav/
I found I got a Method not allowed message when trying to point FolderSync at the IP address. I found I needed to add the complete WebDAV path.
We can then test the connection - click TEST. This lets us know if Nextcloud is setup to allow the synchronisation.
I realised I needed to add the local IP address as a `trusted_domain` in Nextcloud
The fix to this is to add the IP address to the trusted_domains list.
$ docker exec -u www-data a51ca66f06c0eddcade46f71d99e363b66df1dd2de1e93903731b1e0b1f121c2 php occ config:system:get trusted_domains
bordeaux:8081
$ docker exec -u www-data a51ca66f06c0eddcade46f71d99e363b66df1dd2de1e93903731b1e0b1f121c2 php occ config:system:set trusted_domains 1 --value=192.168.0.3
System config value trusted_domains => 1 set to string 192.168.0.3
$ docker exec -u www-data a51ca66f06c0eddcade46f71d99e363b66df1dd2de1e93903731b1e0b1f121c2 php occ config:system:get trusted_domains
bordeaux:8081
192.168.0.3
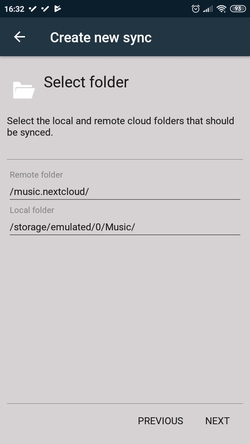
For Remote folder, choose the folder on the Nextcloud server, relative to the Admin's files. Because we copied music.nextcloud into that location with its children, that's the folder to choose.
For Local folder, choose the local folder to synchronise to. In this case it's a folder on the phone's storage.
Click Next and on the next step ignore the schedule.
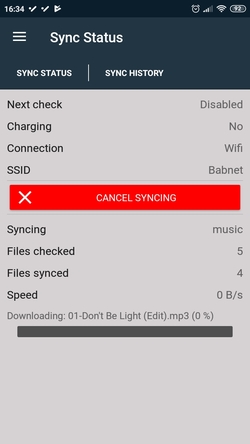
Now click Folderpairs and then Sync
Click back to Sync Status to show the synchronisation status.
For me, file synchronisation appears to be pretty slow, but it was over wifi, after all.
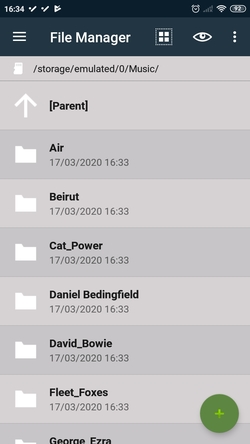
Finally, our music completed its synchronisation:
What’s the verdict?
This is a solution that works, for sure. Once configured, it’s great to have scheduled synchronisations configured so it’s essentially automated.
The whole setup process is way too complicated for most people - it’s understandable how many people would prefer a hosted service already setup.
It would be great if there was a way of filtering or transforming the music files somehow, during the synchronisation. For example, I only want MP3s or Oggs to save space. Furthermore, I don’t want my entire collection, just new music and some old favourites.
I can also see this working well, in reverse, for use cases where content is created on the phone, and then backed up. For example, photos taken on the phone.
If you have the technical chops, give Nextcloud a try!


