Using Picard to tag MusicBrainz IDs
March 26, 2013 in digital music by Dan Gravell
MusicBrainz Identifiers identify musical releases, artists and more "musical entities". They're useful for a number of reasons, including improving access to musical metadata you might not already have. MusicBrainz maintain their own software, Picard, for tagging music files with information from MusicBrainz. The information that can be tagged includes MusicBrainz Identifiers (MBIDs).
I thought I'd follow up on my previous list of reasons for tagging MBIDs with how to actually do it!
Picard works by fingerprinting your music files and looking up data online. There are a couple of gotchas when using Picard, which need to be explained. Furthermore, if you simply want to add MBIDs then you must follow a procedure to only store that information, otherwise other metadata may be overwritten.
Picard is available for Windows, OS X and Linux so go download and install your copy first!
Matching and clustering
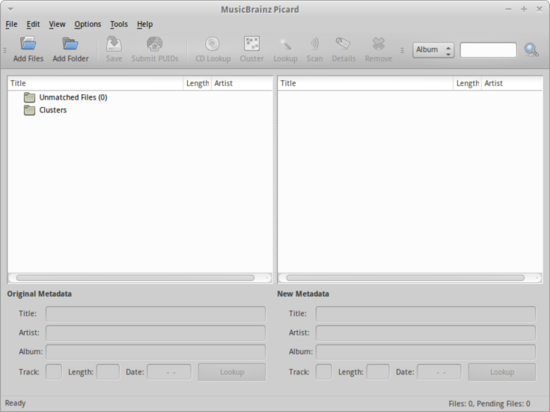
When you start Picard you'll get a fairly empty UI:
First, we add files for which we want to add the MBID to the left-hand side. You can either drag folders or files into the left-hand side space, or use the Add Files / Add Folder controls. Here, I'll add in the Rolling Stones' Let It Bleed:
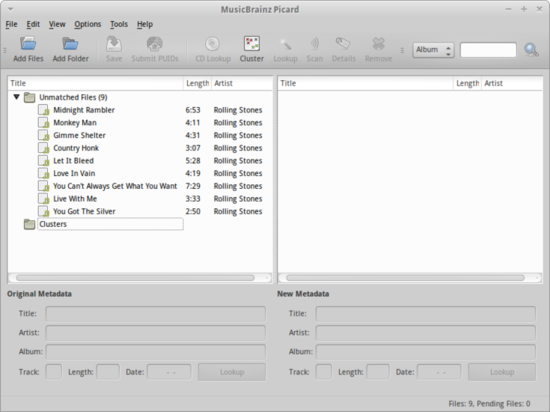
The files appear under Unmatched Files. If you click any individual file you'll see the Lookup button and other toolbar buttons all become enabled. Don't press them! This is the first gotcha... if you have 'Unmatched Files' you must first cluster them. Deselect the file or click on the Unmatched Files node. Then click Cluster. You'll be rewarded with:
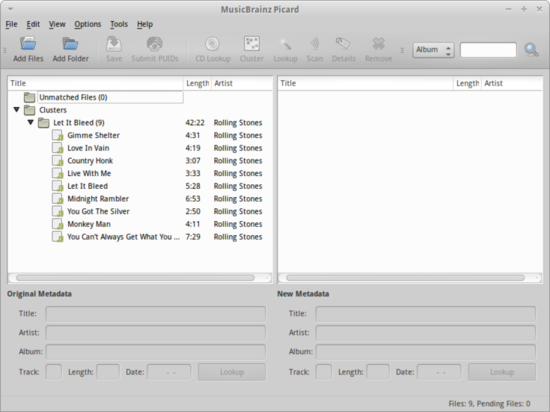
The files have now been recognised as being in one album. It is important you do it this way because, otherwise, the individual tracks will be looked up and may end up being tagged with different MBIDs for different releases. For instance Gimme Shelter features in many different releases of Let It Bleed and many, many other compilations. You want all of these tracks to be tagged in the same release, and that's what clusters are for.
Now, click the Let It Bleed node and click Lookup. Picard now looks up the data for each file and shows it in the right-hand side:
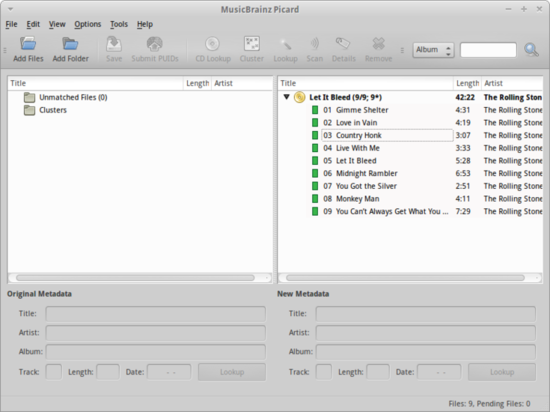
Now that the metadata for this release has been discovered, we can proceed to tagging the MBID.
Tagging MBIDs
If you click on any of the files and then click Details you can see all of the metadata found for that track on MusicBrainz:
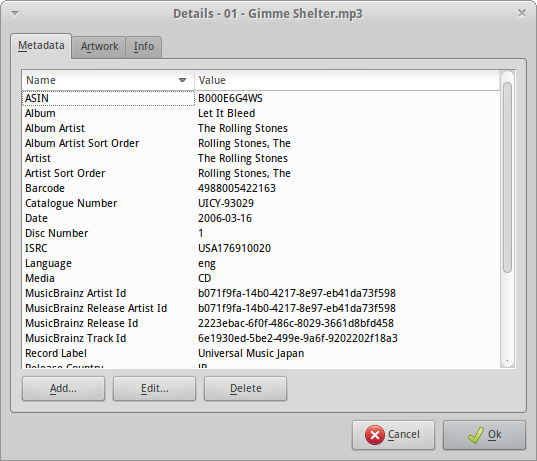
Pertinently, the MBID can be seen under MusicBrainz Release Id.
There's a lot of information there, which is useful. However, we already have a number of these tags inside the music files, and I'm not interested in replacing them. I just want the MBID. Luckily it's not too difficult to save only the MBID.
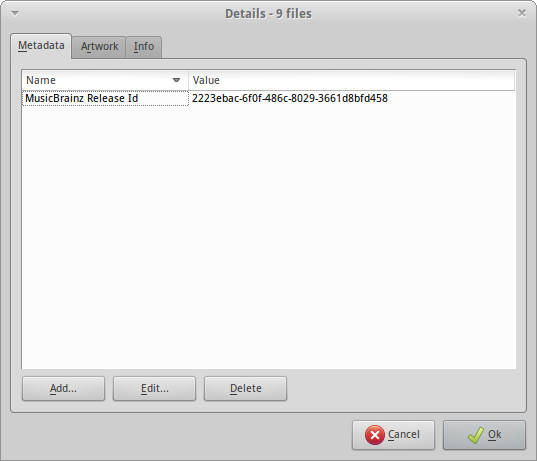
First, click Cancel and then select each file in the album using shift-click for a range selection or ctrl-click for individual items. Then click Details again. You'll see that all shared information is displayed. Now, we want to delete all data that isn't of interest. Click to select the first line, in this case ASIN. Then, click Delete until MusicBrainz Release Id is the first datum shown. Then, click the datum after MusicBrainz Release Id and click Delete to remove all data underneath. You should end up with just the pertinent data displayed:
Click Ok.
Now, click the Save button, and all the MBIDs will be saved into your music files. The MBID shows up in other software:

If you fancy adding MBID release IDs to your albums, I hope this helps!


