Manage your Synology music library
Supported on all recent Synology versions with 512MB or more, 2xx series and up.
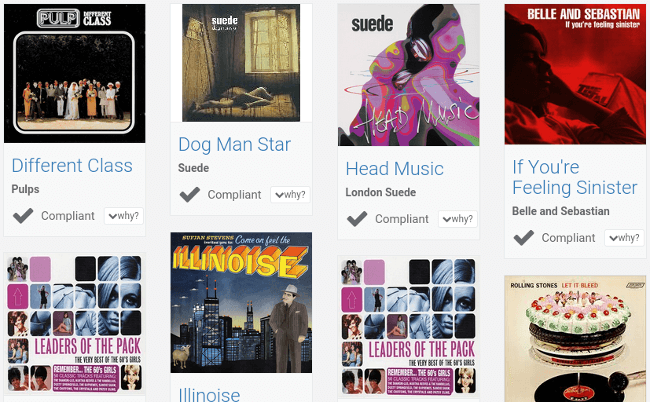
Find album art
bliss is an album art finder that is simple, fast and accurate. bliss finds and installs album art automatically. bliss is fully automated and can even add album art to your music in the background, as you add the music to your collection. bliss uses both reputable and expansive sources for its album art.
Automatic music manager
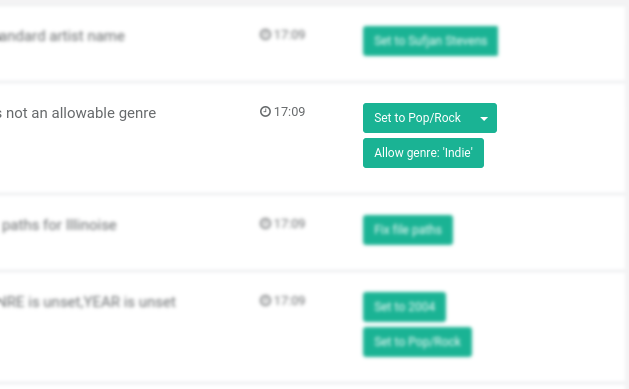
bliss works by applying rules to your music library. When you add an album to your library, bliss automatically assesses the album against your rules. If the album is non-compliant, bliss decides a fix to make sure the album obeys the rule, and optionally applies it automatically.

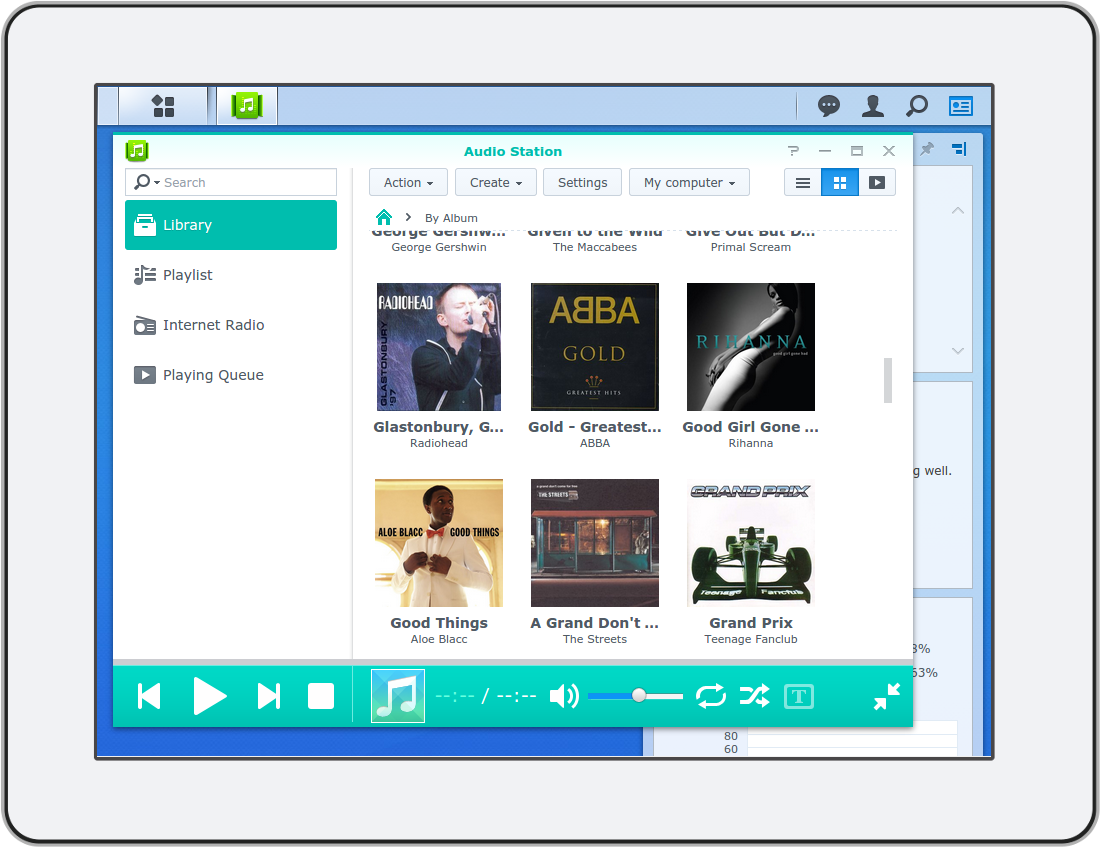
Runs on Synology, alongside Audio Station
bliss runs on your Synology itself, as a background process. When music is added to your library, bliss sees this and applies its rules automatically to ensure your library remains consistent, complete and correct. Audio Station's album art and MP3 tags are automatically re-indexed by DSM.
How to install bliss on your Synology device
To install bliss as a package on a Synology NAS, there are four steps:
- In DSM 6, trust all publishers.
- Add the bliss package repository to Package Center.
- Install Java within Package Center.
- Install bliss within Package Center.
- In DSM 7, grant bliss access to your music folder.
Once the bliss package repository is added, your Synology NAS will be kept up to date with updates and updating bliss will generally be a one-step process.
Alternatively you can install from a .spk file manually.
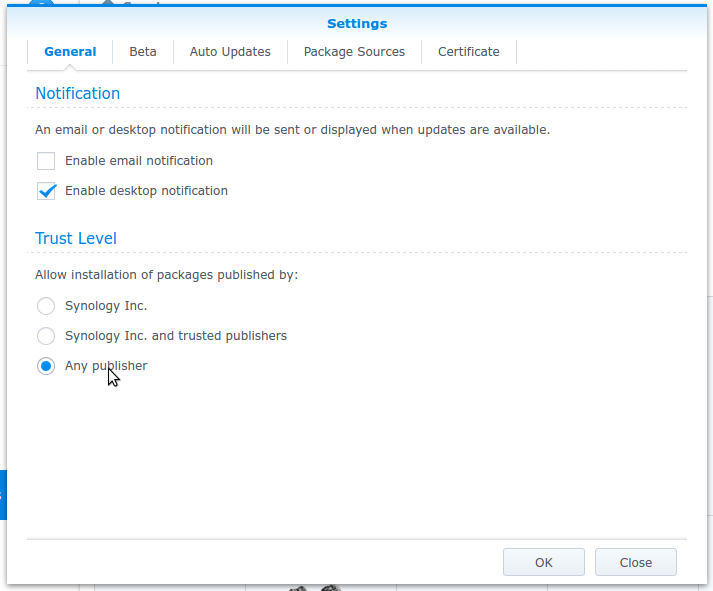
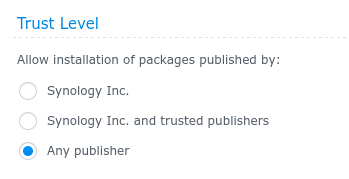
- Open Package Center.
- Click Settings.
- Under Trust Level, choose Any publisher.
- Click OK.
Add the bliss package repository
The bliss package repository is a URL that you copy and paste into Package Center. The URL you use depends on whether you are using DSM 6 or DSM 7. Nevertheless, the general installation steps are the same:
- Open Package Center.
- Click Settings.
- Click Package Sources.
- Click Add.
- In the Location text field, copy and paste (if you are using DSM 7):
https://www.blisshq.com/repo/syno/packages-DSM7.json
If you are using DSM 6 use:https://www.blisshq.com/repo/syno/packages-pre-DSM7.json
- Click OK.
- Click OK again, this time on the Settings dialog.
At this point, the behaviour alters slightly depending on the DSM version you have.
On DSM 7, Package Center should refresh and the bliss packages will appear as a package to install.
On DSM 6, Package Center generally has to be closed then re-opened before the packages display.
Install Java
- Open Package Center.
- In the Search bar, type java and press [enter].
- Click the Install button under the Java Installer package.
- Accept the warnings about third party developers (they ain't that bad).
- Click Done.
The Java package will now install. When it is successful you'll see:
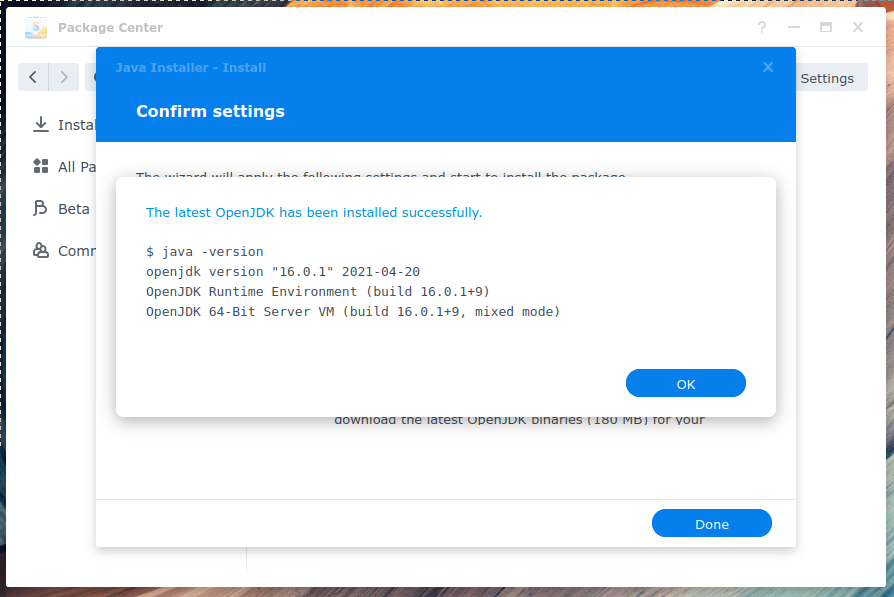
Once Java is installed you can move onto the final step.
Install bliss
- Open Package Center (if not already).
- In the Search bar, type bliss and press [enter].
- Click the Install button under the bliss package.
- Accept the warnings about third party developers (they're just misunderstood).
- Accept the licence agreement.
- Click Done.
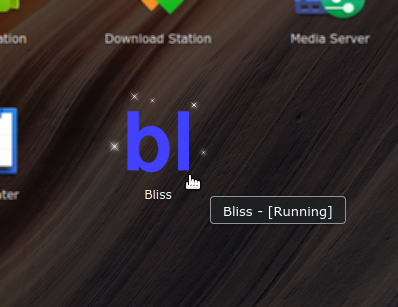
Once bliss has installed, you can open it from the menu at the top-left of the DSM page.
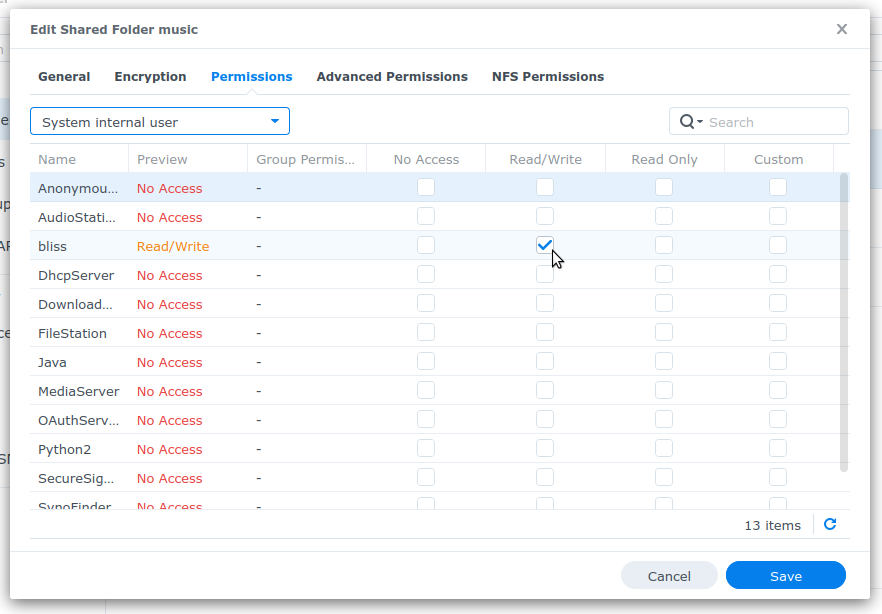
Grant bliss access to your music folder
bliss is now running, but for it to see your music, and fix it, you're going to have to grant it permissions to read and write to your music folder.
This is fairly straight-forward:
- Open Control Panel.
- Click Shared Folder.
- Click the music share and then Edit.
- Click the Permissions tab.
- Change the drop-down box from Local users to System internal user.
- Find bliss and check the Read/Write checkbox.
- Click Save and then close Control Panel.
bliss should now be able to scan, assess and fix your music.
Updating bliss
Now you've added the package repository, DSM will periodically check for updates. When there is an update you can update bliss from the Package Center.
The pre-requisite for this step is to have Java already installed. To install Java, see the instructions for adding the package repo above.
- Download the
.spk: - In DSM, enter Package Center.
- Remove any existing bliss installation.
- Enter Settings and on the General tab make sure Trust Level is set to Any publisher:
- Close the Settings tab, click Manual Install and provide the
.spkfile
If you leave your email address here, Dan will get in touch in a few days to find out how you got on, and see if he can help anymore.